Zmodo DVR not working?
A slow or broken recorder doesn't always mean the footage is gone. Here's how to get your saved recordings onto your computer and check whether we can open them.
If the menu still opens
Even if playback is slow or the app isn't working, the DVR may still let you save recordings directly to a USB drive.
Menu names vary by model. Zmodo's USB backup guide shows an example.
Find the date and camera
Use the screen and mouse connected to your DVR. Open Playback, Search, or Backup, then choose the camera and time you need.
Save the recordings to USB
Plug in a USB drive with enough free space. Select your recordings and choose Backup or Export. Wait for it to finish before removing the USB drive.
Put the files on your computer
Connect the USB drive to your computer and save the recordings in a folder. If the filenames end in .264, you can check them here. Other file types may already play, or need a different tool.
If the DVR won't start
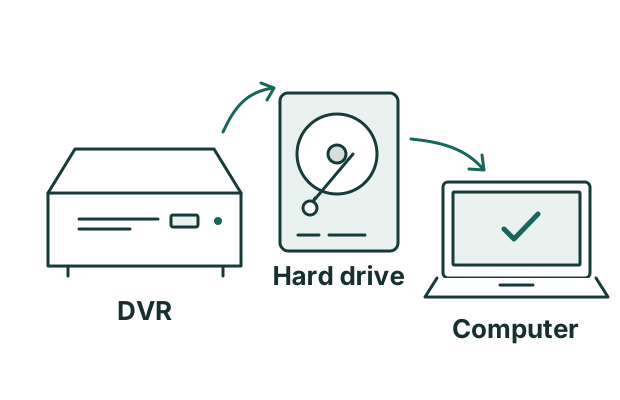
The drive inside may still contain your recordings. This walkthrough uses a Windows computer and one healthy, readable SATA hard drive. If the connectors are different or your DVR has several drives, ask for help before removing them.
What you'll need
- A computer with space for the recordings
- A screwdriver suitable for your DVR
- A USB-to-SATA adapter or dock that fits the drive; a 3.5-inch drive needs an external power supply
- A reader that opens the drive without changing it
Don't open the metal hard drive itself. If it clicks, repeatedly disconnects, or reports read errors, stop and get help from a data recovery specialist.
If your computer offers to format, initialize, or repair it, cancel. Those actions can change or erase the recordings.
Turn off and unplug the DVR
Follow your model's manual to remove the cover and drive. Take a photo of the cables before disconnecting them, then undo the drive's mounting screws. Ask a technician if you aren't comfortable opening the recorder.
Connect the drive to your computer
With the adapter switched off, connect it to the drive. Attach its power supply if required, then connect USB and switch it on. Follow the adapter's instructions; don't force the connectors.
Open the drive with a reader
For Windows, DiskInternals Linux Reader can read supported drives without writing to them. Choose the DVR drive by its model and size. Some recorder drives use storage the reader cannot open.
Find your recordings
Browse the folders for the date and camera you need. Look for folders such as record or recordings and files ending in .264. Names may start with recfile. You don't need to open the videos yet.
Save the files to your computer
Select the recordings and use the reader's Save files option. Choose a folder on your computer or another drive, with enough free space. Keep the files on the DVR drive unchanged.
See the reader's illustrated instructions
When you have your recordings
A .264 file is a saved recording from some Zmodo recorders. A regular video player may not open it. Our free check shows whether we can decrypt it, with a screenshot of the first frame.
Check a saved recording
Choose a .264 file from the folder you saved. If the check works, you'll see its first frame.
Choose the recordings to recover
Create an account, include all the recordings you want together, and review their first frames. Upload the files, then review the price and pay.
Download and watch
We process the recordings after payment. Your recovered videos are available in your Dashboard when they're ready.
No sign-in or payment needed.